750,000+ kits de retoque vendidos en todo el mundo
DHLUPSFedEx

Reparación profesional · en casa

Cómo aplicar tu pintura de retoque

Gracias por elegir Color N Drive: una mezcla a medida que permite a cualquiera lograr una reparación de aspecto profesional en su CADILLAC en casa, con secado rápido y un color original de fábrica perfecto. Sigue los cuatro pasos de abajo.

Retoca en 4 pasos

01

Limpia

Prepara el impacto con Correct'N'Clear. La superficie debe estar limpia y seca.

02

Retoca

Aplica tu pintura con color exacto sobre el daño en capas finas.

03

Retira

Desliza la tarjeta en plano para retirar el exceso: la pintura queda dentro del arañazo.

04

Finaliza

Limpia el exceso restante con Correct'N'Clear y luego pule para integrar el color.

Guía de usuario · 11 idiomas

La guía completa, en tu idioma

Elige tu idioma para leer la guía completa paso a paso, o descarga el PDF imprimible para guardarlo con tu kit.

Vista previa de la guía de usuario en EnglishAbrir PDF completo

🇬🇧 English · PDF

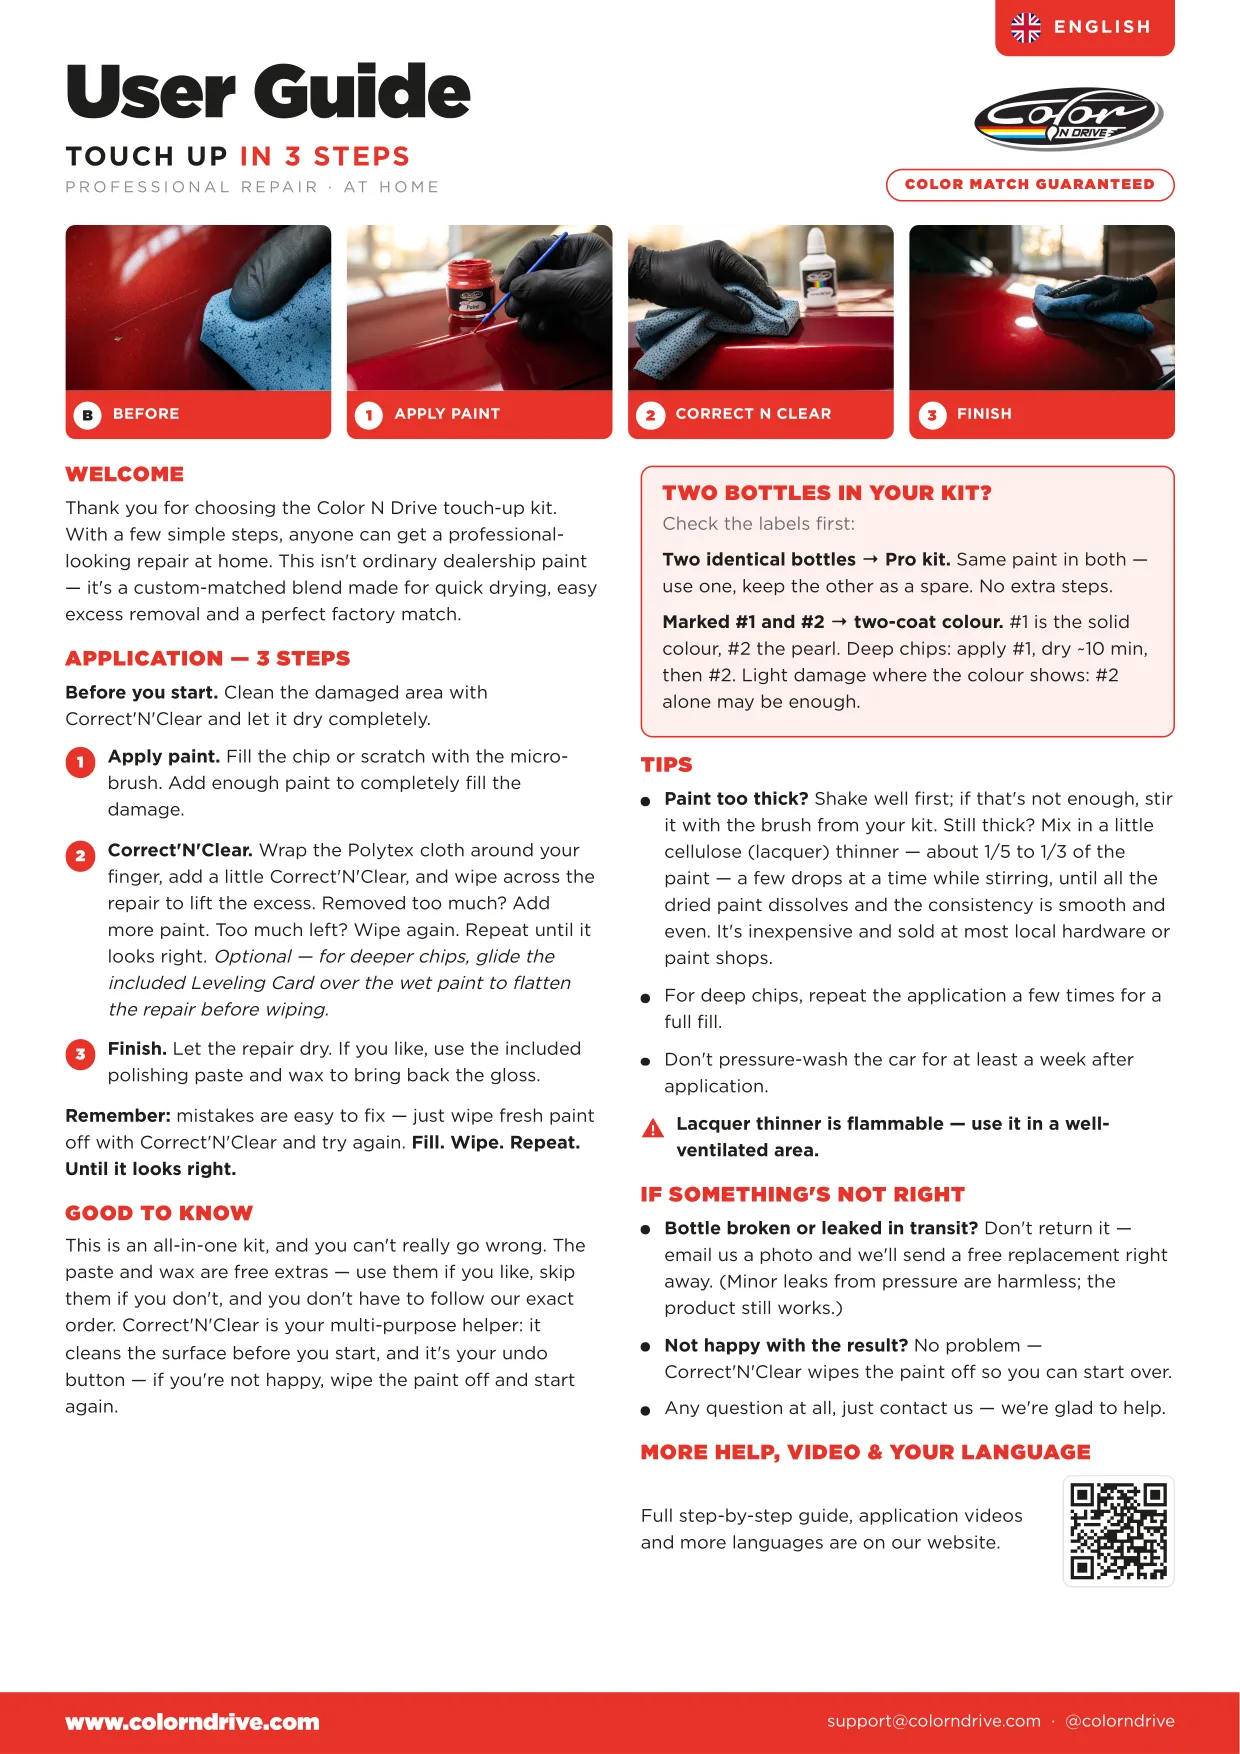
WELCOME

Thank you for choosing the Color N Drive touch-up kit. With a few simple steps, anyone can get a professionallooking repair at home. This isn't ordinary dealership paint — it's a custom-matched blend made for quick drying, easy excess removal and a perfect factory match.

APPLICATION — 3 STEPS

Before you start. Clean the damaged area with Correct'N'Clear and let it dry completely.

Apply paint. Fill the chip or scratch with the microbrush. Add enough paint to completely fill the damage. Correct'N'Clear. Wrap the Polytex cloth around your finger, add a little Correct'N'Clear, and wipe across the repair to lift the excess. Removed too much? Add more paint. Too much left? Wipe again. Repeat until it looks right. Optional — for deeper chips, glide the included Leveling Card over the wet paint to flatten the repair before wiping. Finish. Let the repair dry. If you like, use the included polishing paste and wax to bring back the gloss.

Remember: mistakes are easy to fix — just wipe fresh paint off with Correct'N'Clear and try again. Fill. Wipe. Repeat. Until it looks right.

TWO BOTTLES IN YOUR KIT?

Check the labels first: Two identical bottles → Pro kit. Same paint in both — use one, keep the other as a spare. No extra steps. Marked #1 and #2 → two-coat colour. #1 is the solid colour, #2 the pearl. Deep chips: apply #1, dry ~10 min, then #2. Light damage where the colour shows: #2 alone may be enough.

TIPS

Paint too thick? Shake well first; if that's not enough, stir it with the brush from your kit. Still thick? Mix in a little cellulose (lacquer) thinner — about 1/5 to 1/3 of the paint — a few drops at a time while stirring, until all the dried paint dissolves and the consistency is smooth and even. It's inexpensive and sold at most local hardware or paint shops. For deep chips, repeat the application a few times for a full fill. Don't pressure-wash the car for at least a week after application. Lacquer thinner is flammable — use it in a wellventilated area.

IF SOMETHING'S NOT RIGHT

GOOD TO KNOW

This is an all-in-one kit, and you can't really go wrong. The paste and wax are free extras — use them if you like, skip them if you don't, and you don't have to follow our exact order. Correct'N'Clear is your multi-purpose helper: it cleans the surface before you start, and it's your undo button — if you're not happy, wipe the paint off and start again.

Bottle broken or leaked in transit? Don't return it — email us a photo and we'll send a free replacement right away. (Minor leaks from pressure are harmless; the product still works.) Not happy with the result? No problem — Correct'N'Clear wipes the paint off so you can start over. Any question at all, just contact us — we're glad to help.

MORE HELP, VIDEO & YOUR LANGUAGE

Full step-by-step guide, application videos and more languages are on our website.

Vídeo de aplicación

Mira el vídeo completo de aplicación

Descubre exactamente cómo se combinan los pasos de limpiar, aplicar, retirar y dar el acabado para lograr un resultado liso y con color original de fábrica, de principio a fin en pocos minutos.

Correct'N'Clear — tu red de seguridad

A menos que tu coche sea nuevo, puede que el color no coincida a la perfección al principio: la pintura de fábrica se decolora con el tiempo. Ve acumulando pintura hasta que el tono sea el correcto; Correct'N'Clear retira el retoque de forma segura en cualquier momento, así puedes trabajar con confianza y sin riesgo.

Pasos de aplicación

  1. 1

    Limpia

    Elimina toda la suciedad, cera y pulimento con Correct'N'Clear y deja secar.

  2. 2

    Aplica

    Con el micropincel, aplica la pintura en el impacto en capas finas: ve acumulando poco a poco, sin encharcarlo.

  3. 3

    Retira y nivela

    Con la pintura aún húmeda, desliza la tarjeta de Color N Drive en plano, como una espátula, para retirar el exceso; la pintura queda compactada en el arañazo. ¿No tienes tarjeta? Sirve cualquier tarjeta de visita rígida.

  4. 4

    Limpia

    Una vez seco, pasa un poco de Correct'N'Clear por la zona con el paño. No aprietes con fuerza: deja que la solución actúe. Repite hasta que solo quede el arañazo relleno.

Acabado estético (opcional)

Pasta
Sin abrasivos; suaviza la transición de color alrededor de la reparación.
Cera
Pule todo el panel para conseguir el brillo más uniforme y homogéneo.

Consejos

  • Agita bien el bote antes de cada uso para evitar grumos.
  • Impactos profundos: repite la aplicación varias veces para rellenarlos por completo.
  • ¿Panel recién repintado? Deja que cure alrededor de 1 mes antes.
  • Nada de lavado a presión durante al menos 1 semana tras la aplicación.

Dos botes idénticos → kit Pro

La misma pintura en ambos: usa uno y guarda el otro de repuesto. Sin pasos adicionales.

Marcados #1 y #2 → color en dos capas

El #1 es el color sólido, el #2 la perla. Impactos profundos: aplica el #1, deja secar unos 10 min y luego el #2. Daños leves donde se ve el color: puede bastar solo con el #2.

¿Aún tienes alguna pregunta sobre la aplicación de tu pintura?